In the constantly evolving world of game development, efficiency is key. Aspiring developers and seasoned veterans alike constantly seek ways to streamline their workflows without compromising quality. Thanks to modern-day technology, 3D Animation has never been easier! This tutorial will show you how to create these easy animations for free. This is done thanks to the wonderful combination of Godot and Mixamo. Godot is a free open-source game engine that has been becoming more popular and making a name for itself over the past several years. Mixamo is a tool that can automatically rig and animate 3D characters. With its vast library of pre-made animations and user-friendly tools, Mixamo can turn any 3D character model into a game-ready fully animated character. Whether you’re a novice looking to dip your toes into the world of game development, or a seasoned developer looking to change things up, this guide is tailored to simplify the process of character animation, allowing you to focus more on gameplay mechanics and other core aspects of your game.
Download Asset/s
To create our asset, we will be using a simple Low Poly 3D model which is available for free and is neither rigged nor animated. You can easily find numerous examples of such models on platforms like Itch and Open Game Art. You can use any model or mesh that you desire. The only requirement is that it has a .obj (or .blend) file and a texture image. Ideally, you’ll want you want your model to resemble a person in the sense that it has the same number of limbs. You will also want to find a model in a default post such as a T pose or an A pose. This will make the auto-rigging process much easier and more accurate.
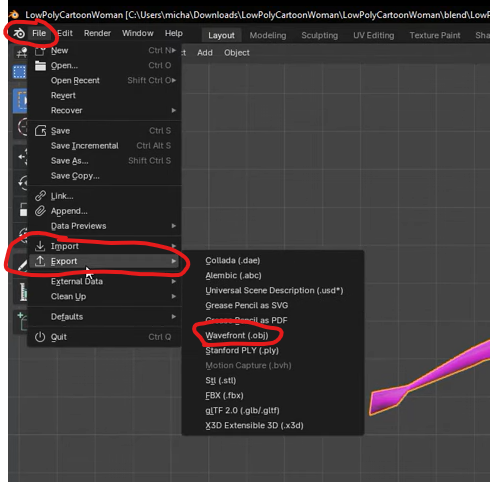
If your project only has a .blend file, you must open this in Blender. You can then export it as a .obj file with a few simple clicks: File -> Export -> Wavefront (.obj)
Auto Rigging and animating in Mixamo
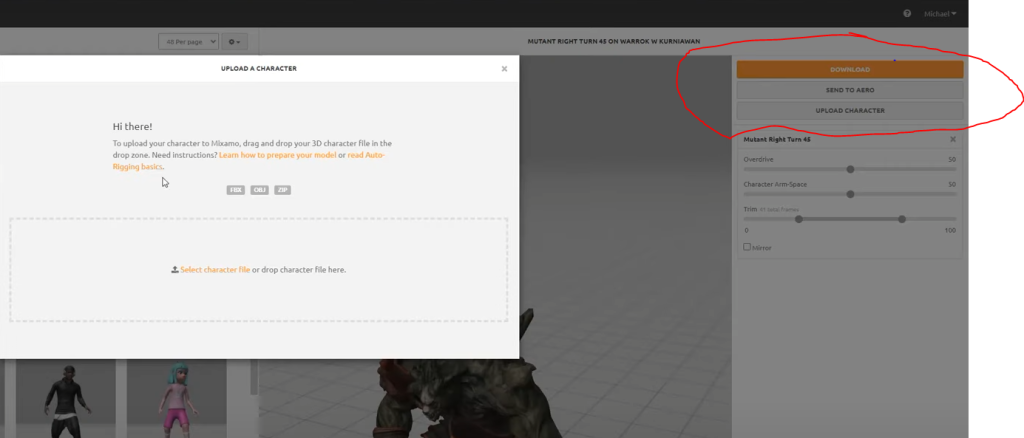
Next, we can make our way to Mixamo. You will need to create a free account with your email to access the features of Mixamo. After logging into your account, you will see a button on the right-hand side that says “Upload Character”. Click that and upload your .obj file.
After your character has finished uploading, you can begin the setup for the auto-rigging process. Drag the chin, wrists, elbows, knees, and groin elements onto your model. Also, be sure to change the “Skeleton LOD” option if your model has something aside from a standard 5-finger hand.
You can now begin shopping for animations. The only mandatory animation is the T-Pose animation. After downloading that, you can explore Mixamo’s vast collection of animations and download any you would like for your game. All animations have settings on the far right-hand side. Before downloading, be sure to modify these settings to improve your animations. Depending on your character’s body, you may need to modify the “Character Arm Space” or “Posture” settings to make your animation look more smooth. When adjusting these animation settings, it is key that you select the “In Place” option for any animation that has it. This will often be seen in walking and running animation.

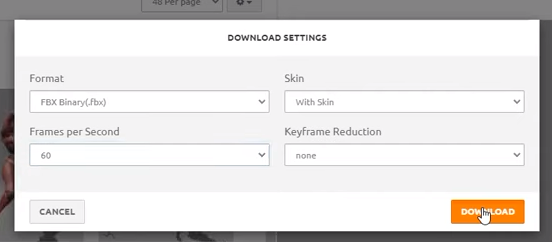
When downloading your animations for Godot, the only thing you should need to change for the “Download Settings” are the frames per second. Rase this to 60. Here is an example of my download settings :
Combining and exporting downloaded Mixamo animations
Once all of your animations are downloaded, you can combine them and export them Into an animated Godot character. For this step, we will be using an amazing Github project. If you prefer to locally download it or check out the code, the full repository can be found at https://github.com/nilooy/character-animation-combiner. However, we only need the online version of this project to accomplish our goal. Naviagate to https://nilooy.github.io/character-animation-combiner/ and at the top left for “Upload File with Character” select your downloaded t pose animation (.fbx file). Then, add your texture image to the “Change Texture” section. You can now upload the rest of your animations in the “Upload Animations (.fbx)” section. All of these animations will appear on the right side of the interface. After testing each animation thoroughly, select the “Export GLTF” option and save the .GLTF file.
Importing into Godot project
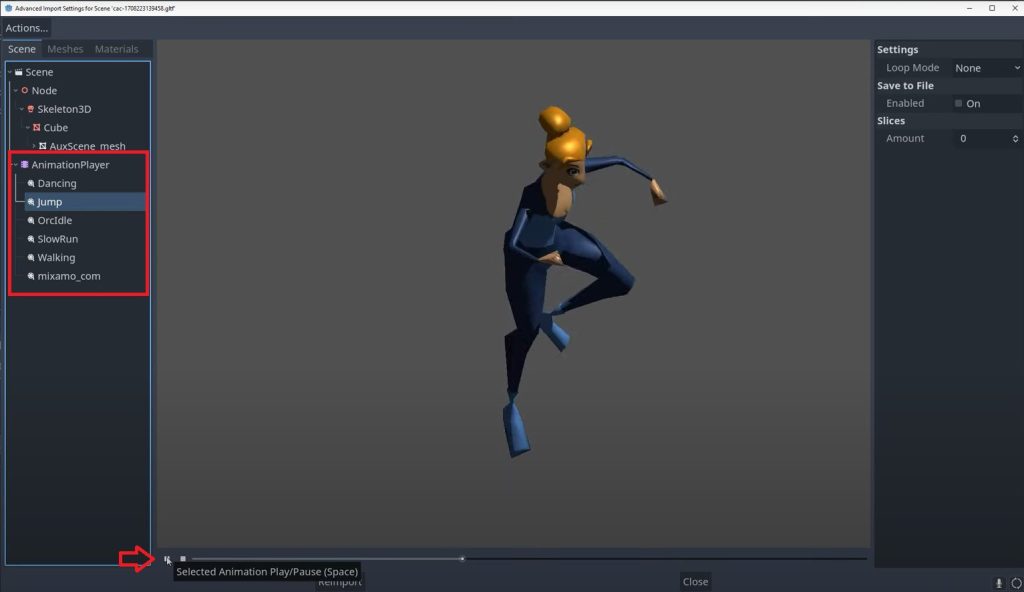
Next, drag and drop your .GLTF file into your Godot project. You will see that a new scene is created here. Double-click the scene. In the popup window find Godot’s Animation Player node. Your animations can be seen as children of this node. Select each MIxamo animation and make sure they are playing as desired in Godot.
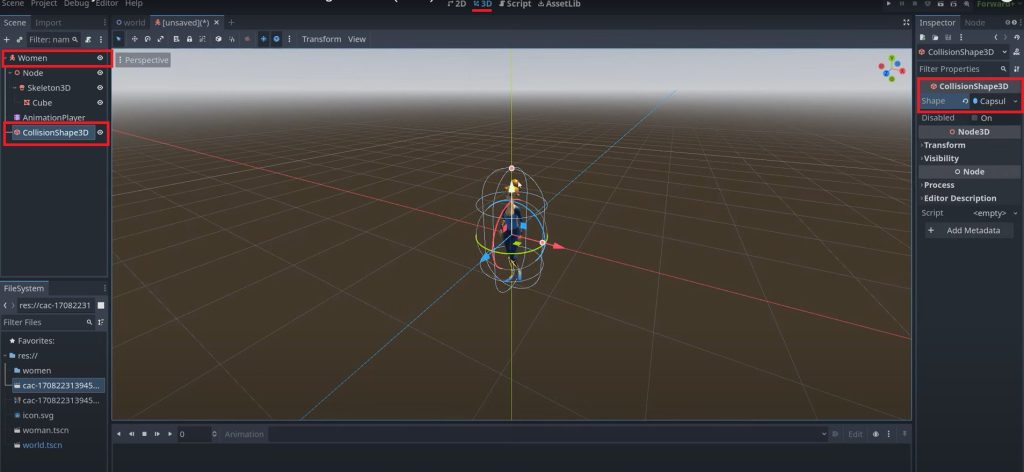
Right-click on the scene and select the “New Inherited Scene” option. Inside of your new scene, double-click the main root node 3D, and rename it to something unique for your character. Right click the same node, select “Change Type” and change it to a “CharacterBody3D”. Right-click this node again, and select “Add Child Node …”. Give this character a “CollisionShape3D” node as a child. With the collision shape 3D node selected, on the right-hand side, select the desired shape of your collision shape. Now you can alter the size of this collision shape as needed in the 3D editor.
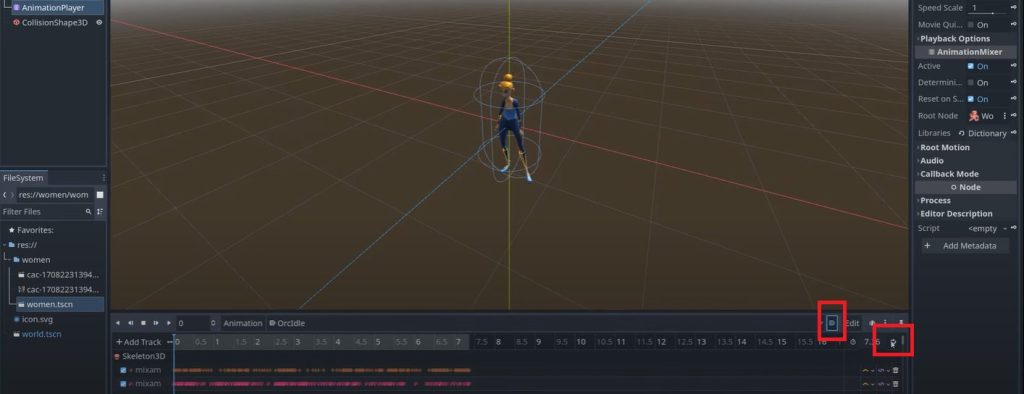
We will also need to define what animations we would like to autoplay and loop here. Select your Animation Player node and pay attention to the newly created pop-up window at the bottom called “Animation”. Use the drop-down menu to select the animation you would like to edit. For looping, select the loop option on the far right side of the bottom window. For auto playing, select the A to the right of the drop-down menu. Here is an example of me auto-playing and looping my idle animation :
Mixamo offers a wide range of animations and a user-friendly interface, while Godot provides great capabilities and a flexible workflow. By combining these two tools, creators now have a powerful toolkit that allows them to bring their creative visions to life with ease. Whether you’re working alone on a big project or collaborating with a team on a new indie game, the synergy between Mixamo and Godot enables you to focus more on your core gameplay mechanics, without having to spend a lot of time and money on character animation.


